

Photo by Eden Constantino on Unsplash
Practical Guide on containerizing app
Containerizing a to-do app by using Docker.


In these projects, will be working with a simple to-do list manager that’s running in Node.js. If you’re not familiar with Node.js, don’t worry. This guide doesn’t require JavaScript experience.
Requirements to complete this project :
\> Docker running locally. Follow the instructions to download and install Docker.
A Git client.
An IDE or a text editor to edit files. Docker recommends using Visual Studio Code.
A conceptual understanding of containers and images.
Get the app
Before we can run the application, we need to get the application source code onto our machine.
Clone the getting-started repository using the following command:
`$ git clone https://github.com/docker/getting-started.git`
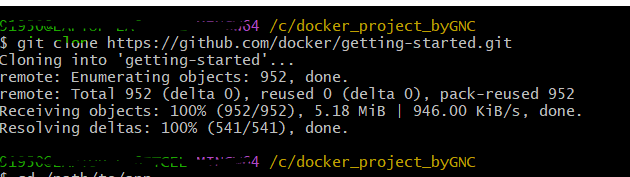
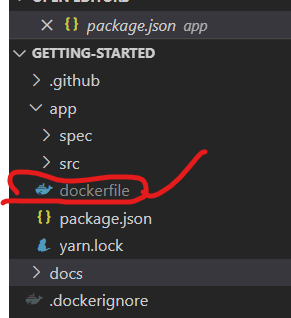
View the contents of the cloned repository. Inside the
getting-started/appthe directory you should seepackage.jsonand two subdirectories (srcandspec).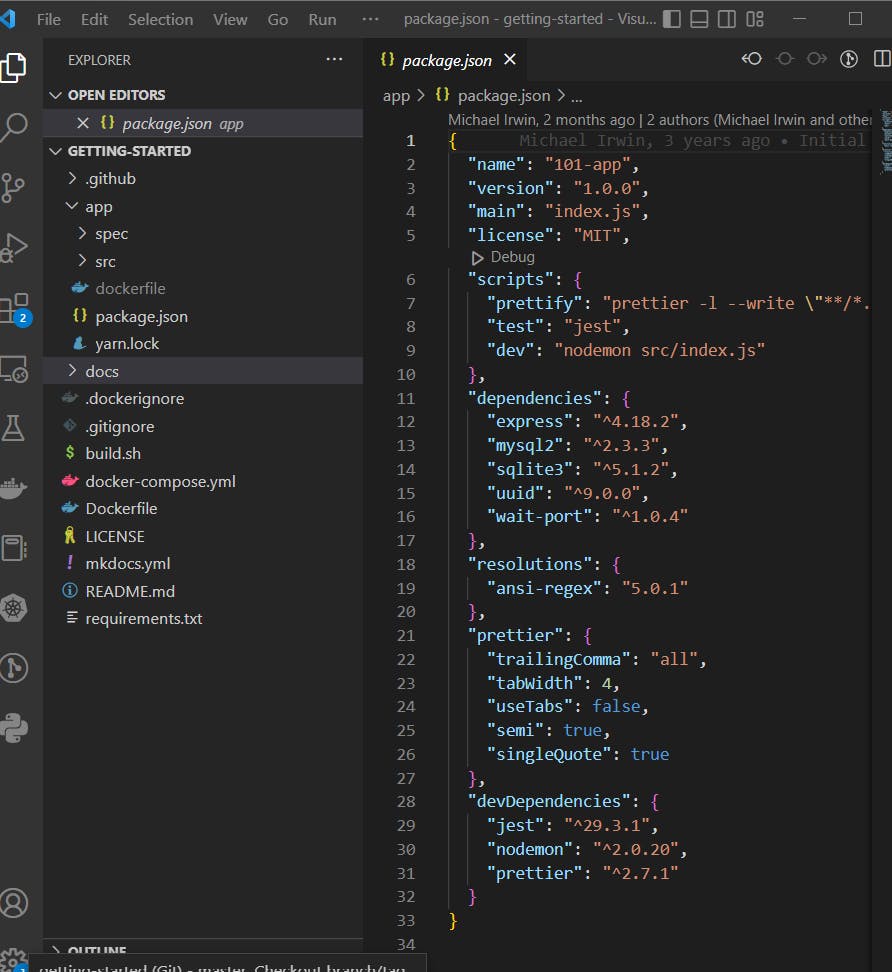
Build the app’s container image
To build the container image, you’ll need to use a
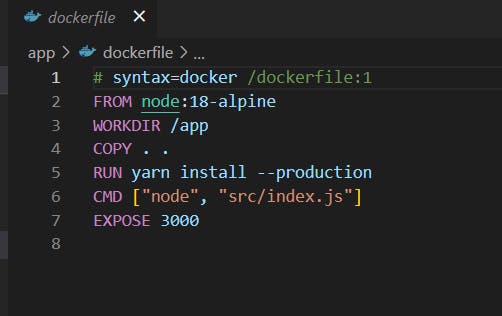
Dockerfile. A Dockerfile is simply a text-based file with no file extension. A Dockerfile contains a script of instructions that Docker uses to create a container image.In the
appdirectory, the same location as thepackage.jsonfile, create a file namedDockerfile. You can use the following commands below to create a Dockerfile based on your operating system.for Linux :
$ touch dockerfilefor Windows :
$ type null > dockerfileUsing a text editor or code editor, add the following contents to the Dockerfile:
Build the container image using the following commands:
In the terminal, change the directory to the
getting-started/appdirectory.
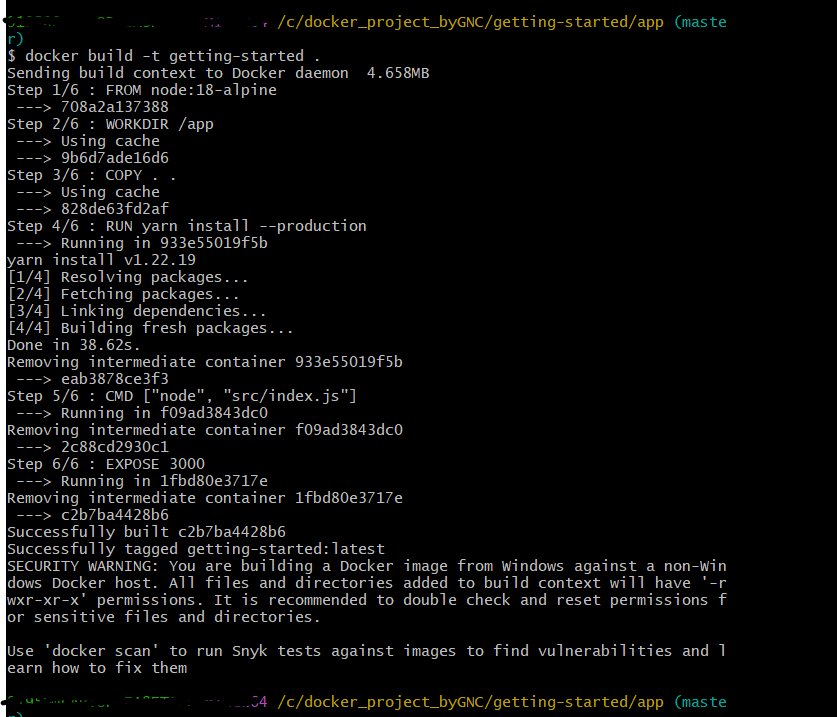
The docker build the command uses the Dockerfile to build a new container image. You might have noticed that Docker downloaded a lot of “layers”. This is because you instructed the builder that you wanted to start from the node:18-alpine image. But, since you didn’t have that on your machine, Docker needed to download the image.
After Docker downloaded the image, the instructions from the Dockerfile copied in your application and used yarn to install your application’s dependencies. The CMD the directive specifies the default command to run when starting a container from this image.
Finally, the -t flag tags your image. Think of this simply as a human-readable name for the final image. Since you named the image getting-started, you can refer to that image when you run a container.
The . at the end of the docker build the command tells Docker that it should look for the Dockerfile in the current directory.
Note :
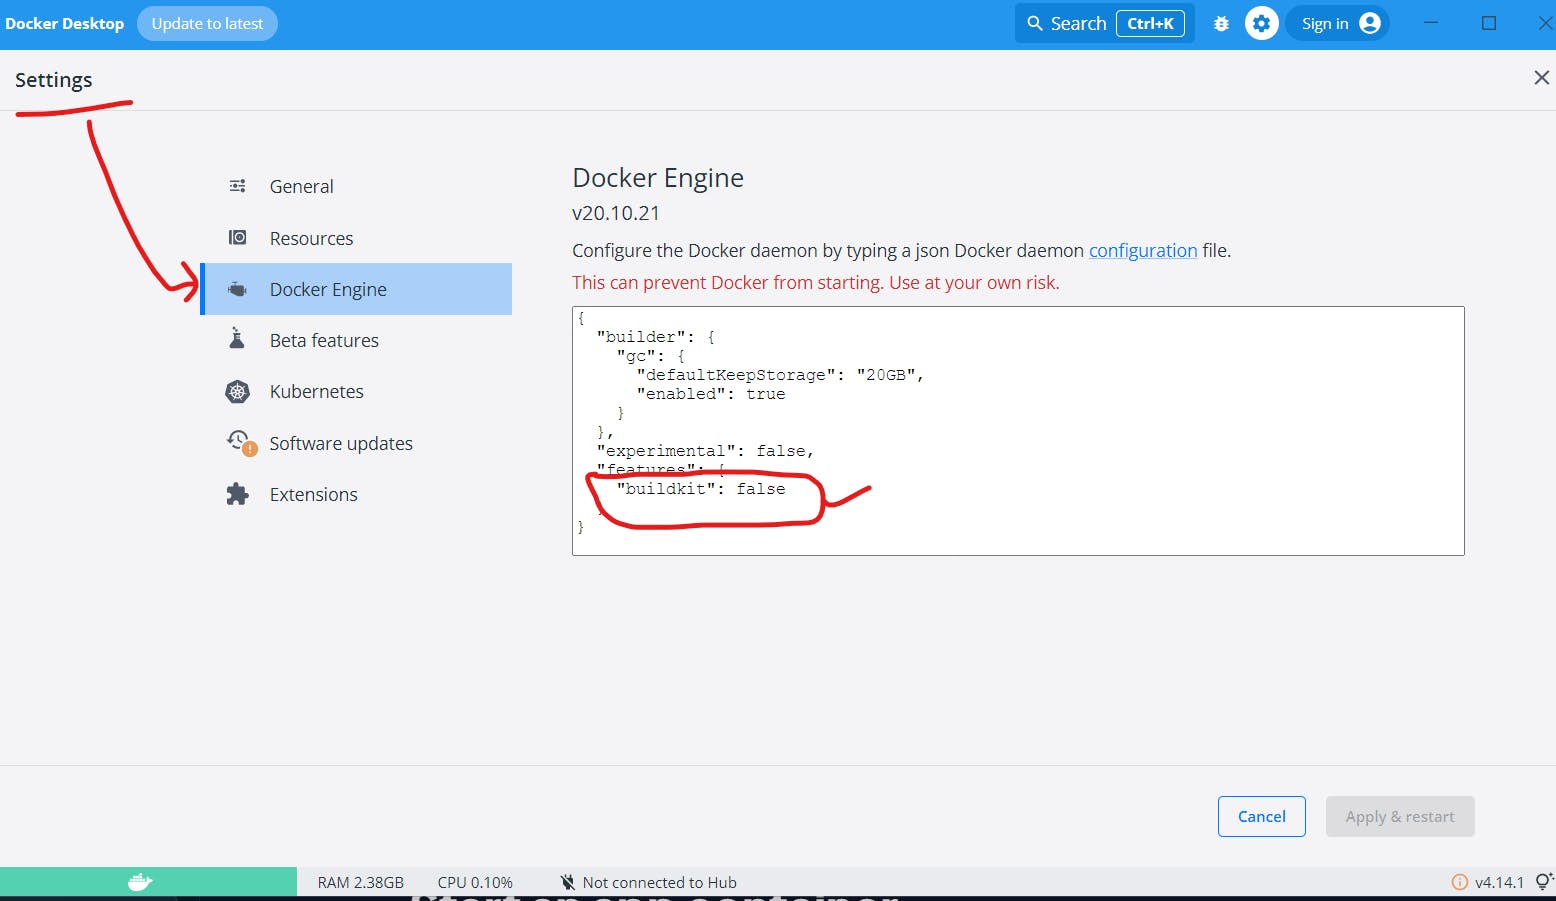
Sometimes, we may get the below error. Solution is in below image.

- First try to change the letter 'd' in the docker file from d to D. If it works ok, if not then go to the second solution which is in the below image.
Go to the docker desktop app on your computer. Inside that go to settings and Docker Engine and then change "build kit" to false.
At last, finally, click on apply & restart button at the bottom of the screen. Now try building the command again. It will work.
Start an app container
Now that you have an image, you can run the application in a container. To do so, you will use the docker run command.
- Start your container using the
docker runcommand and specify the name of the image you just created:

You use the -d flag to run the new container in “detached” mode (in the background). You also use the -p flag to create a mapping between the host’s port 3000 to the container’s port 3000. Without the port mapping, you wouldn’t be able to access the application.
After a few seconds, open your web browser to http://localhost:3000. You should see your app.

Go ahead and add an item or two and see that it works as you expect. You can mark items as complete and remove items. Your front end is successfully storing items in the backend.
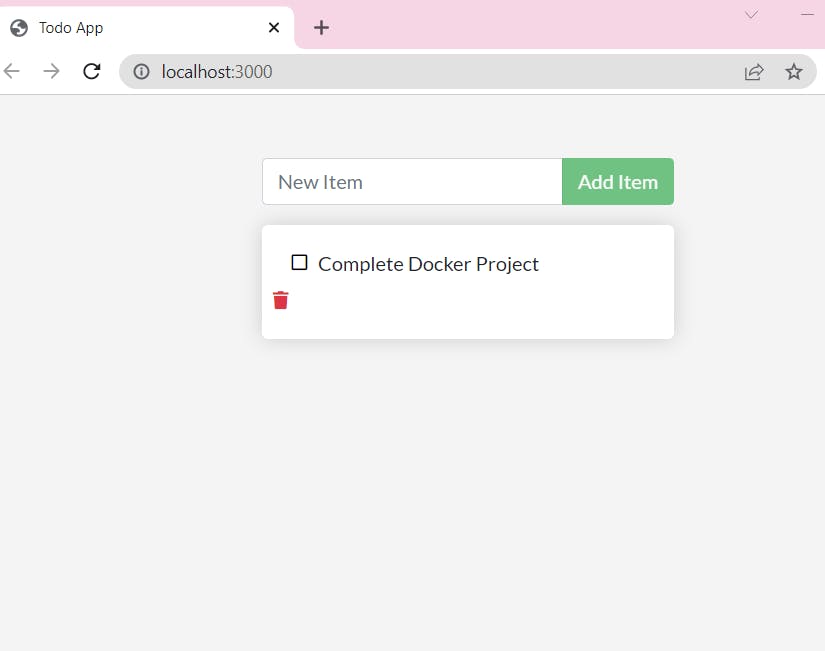
At this point, you should have a running to-do list manager with a few items, all built by you.
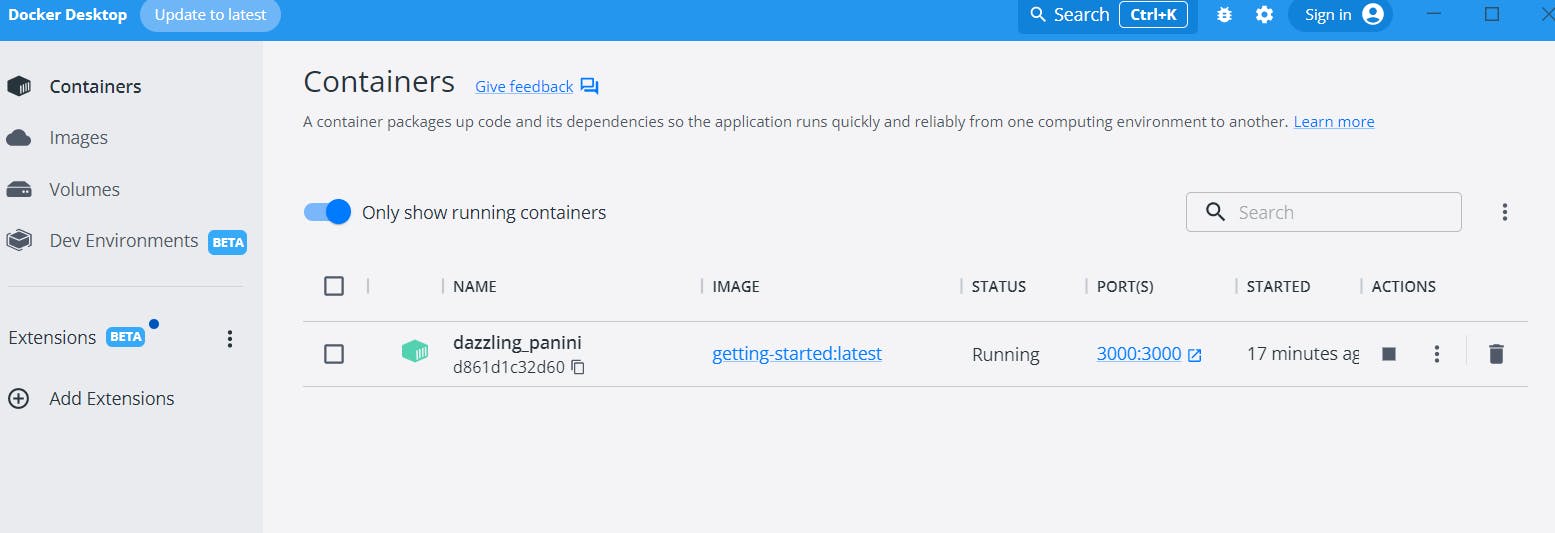
If you take a quick look at your Docker Dashboard, you should see at least one container running that is using the getting-started image and on port 3000.
you learned the basics about creating a Dockerfile to build a container image. Once you built an image, you started a container and saw the running app.
That's it for this blog. Thanks for reading.
Please share your valuable feedback by like, sharing and commenting.
See you soon with another interesting blog.